Despite all the technological advances of the digital era, photography remains an alchemical combination of technical knowledge and artistic vision. In this series of blog posts I will share some tips on both to hopefully put you on the right track to making some great rollercoaster photos.
INSTAGRAM: Follow @IndustrialEntertainment
PICFAIR: Click here for my Picfair Prints Shop
Sit Back… Hold Tight…
I’ve spent the last year working on a rollercoaster photography project that I have just turned in to a book via Blurb. I’m really pleased with it, even though it is just a personal project for now. Also, taking thousands of photos of all sorts of rides in all kinds of conditions has taught me a huge amount about the technical and artistic skills required to make compelling coaster pictures. So I thought I would produce a short series of simple guides sharing what I have learned to help you improve your own photography skills in this specialist, but very popular (take a look on Instagram…) field.
Most of what I say is also useful for general photography and is written from my personal experience and knowledge based on a photography HND with Distinction and eight years as an amateur photographer. If you’ve got an approach that works better for you, that’s great – and I would love to hear about it in the comments, because I don’t think you can ever stop learning.
I’ll start with some basic guidance on what gear I think is best to use to get a strong shot. I will then follow with some easy to understand technical tips, because unless you know how to use your camera you are not going to get the photo you want. I’ll then move on to some basic composition ideas that will help you turn your photos from snapshots into something you can proudly post on Facebook or Instagram, or perhaps hang on your wall.
So, the ONE BIG THING to remember about the camera gear you need for coaster photography is….
Gear Doesn’t Matter – Until It Does
Wait? What?
If having the latest and greatest camera gear is your thing then fine go for it; every photographer suffers from GAS (Gear Acquisition Syndrome) occasionally.
But don’t fall for the marketing fluff that a three grand camera is automatically going to deliver a better photo than the camera on your mobile phone. Most of the great, historically and artistically significant photos were created with cameras of less technical sophistication than the one you probably have sitting in your pocket right now. Imagine…. no “auto” mode – you had manual focus, manual aperture, manual shutter, no zoom, no image preview, and 36 frames at most if you were rich enough to afford to buy and develop the film….
REMEMBER – You can use any camera you want to make great photos of coasters providing you know how to work within its technical limitations.
Once those limitations stop you from getting the images you would like to get at the quality you want to get them, only then should you think about changing your gear.
I started my project using a battered four-year-old Samsung Galaxy S7 phone because I didn’t want to carry a “proper” camera round a theme park. Many of the shots I took on that S7 made the final cut for my book – one even became the cover shot. But I struggled with it when the light was too bright or too dark, and it had no zoom, so I often had to crop the photo.
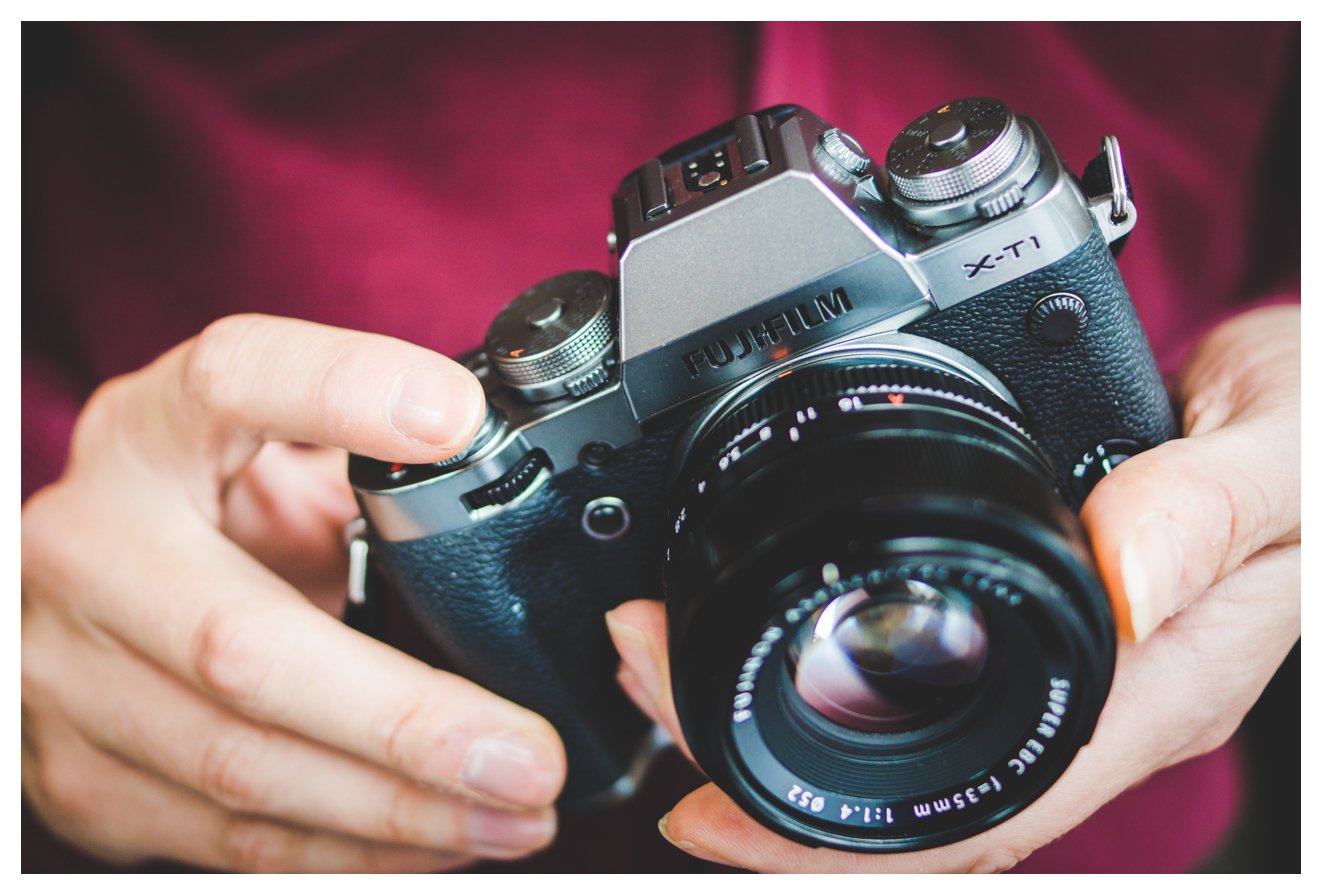
This limited the shots I could get and how I could edit them, so eventually I decided I really did need a “proper” camera and switched to my Fuji mirrorless compact system. But not all the time.
So, over the course of my project I have used my wife’s S6 (when my battery ran out), my S7, which I replaced with an S10 when it died, a five year old Fuji XT1 and a three year old Fuji XT2. Why? Because each one offered me something a little bit different – but the image from one did not automatically look better than the image from another. To prove my point, one of the two shots below was taken on a phone and the other on one of my Fujis. If you fancy telling me which is which, then leave a comment below because I am not sure I can remember!
The Key is to think about the style and type of photos you want compared to what you can get using the camera you have – and you won’t be disappointed. For example, if you want to get lots of close-up coaster pics showing excited, screaming riders then a lot of the time a phone isn’t going to cut it. As most of us can’t just nip out and spend a thousand quid on a fancy new lens or camera you will have to change your composition to suit.
So you need to understand what you can and can’t do with the camera you have and that’s what I will explain next.
Phone Cameras and Coasters
There is an old cliched saying that “the best camera you’ve got is the one you have with you”. And most of us have a phone camera with us all the time, so I’ll devote the rest of this first part of this Blog to how they measure up to serious coaster photography. Below, in plain English, is a list of their advantages and disadvantages so you can decide for yourself if what you already probably have is all you probably need.
My opinion is that for casual or impromptu (oh wow….loooook at that!) theme park photography and if you don’t want to carry a camera (I didn’t when I started!) just use your phone, stick to “auto” mode to make things quick and easy, and concentrate on composition to make a great shot.
The advantages of a phone camera are:
- It’s light, easy to carry and just slips in your pocket when you want to ride the coaster you are photographing! It’s massively convenient.
- It’s point and shoot. No messing around with settings.
- You can take your photo, process it in Lightroom or Snapseed and upload it directly to Facebook, Instagram or wherever, completely seamlessly.
- In good light, the resolution and image quality are great and certainly good enough for most things
- Great for wide angle shots show the curve and flow of the track and trains
- The high speed burst function is brilliant for capturing shots of coasters passing by at high speed so you can pick the best photos later
- It does all the technical stuff for you so you can concentrate on your composition
- Some of the more expensive ones come with different lenses (wide, standard and moderate zoom) so you can get different compositions more easily
- Great for quick “grab shots” when you see something interesting and can’t get your “proper” camera out of its bag in time!
- Believe it or not the physics of the lens mean that, for coaster photos at least, you don’t need to worry too much about focus when the light is good.
- Most have a “Pro” or “Manual” mode where you can customize your shutter speed, ISO, White Balance etc. so if you know what you are doing you can tweak your exposure settings when “auto” mode gets it wrong.
Most phone cameras have a wide-ish angle of view (in other words, they get a lot in the frame!) so I think they are particularly good for capturing the curve and sweep of coaster tracks and wider scenes like this shot of The Smiler at Alton Towers:

The disadvantages of a phone camera are:
- You won’t be able to zoom in to get dramatically close to the coasters and riders. And don’t be fooled by manufacturer’s claims about “digital (pinchy) zoom”. Digital zoom is not real zoom – you are just multiplying pixels and dividing quality. Just don’t. It’s a waste of a photo. To get a close-in shot you will either have to get a phone with more than one lens or physically BE close and that is not always possible or safe. NEVER put yourself in danger for a photo.
- Phone cameras on “auto” are clever, especially the latest models with AI computational photography. But not that clever. In very bright light you might find you still end up with a great looking sky but a dark shadow for a coaster. In low light, you will get a poor quality, noisy image, that might be also be blurred because “auto” selected a very slow shutter speed.
- Most phone cameras have the same “focal length” lens which means that the view you is get the same as every other phone camera in the world. This factor alone means that you will have to work a lot harder to get a unique image that looks different from everyone else’s. It’s amazing what just a change of lens can do for your photo!
- They can be fiddly to use and slow to react when you press the shutter button – so you miss shots.
- The image sensors are tiny (the size of your little fingernail at best) so if the light isn’t right, or you want to post-process (edit) in Lightroom or Snapseed then the image can end up looking…well…. horrible, because there isn’t much capacity for change (called “dynamic range”) in the digital data.
- The “pro” mode is useful but not easy to set when working fast to get shots in moving queuelines or of the coaster in certain places on the track.
All that makes it sound like I am not a fan of phone cameras. That’s not true. If you have a little bit of technical knowledge you can work within the limits of the camera you’ve got to deliver the artistic vision you have.
So… What Can You Actually Do With A Phone Camera?
Every photo in the slide show was taken with my mobile phone. Have a look at them and let me know what you think in the comments:
I didn’t have to mess with settings, I simply got my phone out, found my shot and pressed the button, although all of these needed work in Snapseed or Lightroom and some have been cropped. I think they are all reasonably good coaster photos.
But they also show the limitations I mentioned above. They are all quite “samey” in terms of look, perspective and feel – good for showing line, flow and shape but not always so good for close up drama. The shots of Rita and Nemesis had to be pushed quite hard to brighten the shadows and bring out detail on the coaster – my phone captured the right exposure for the sky but not the coaster which originally came out very dark. This shows in the look of the Rita shot especially – it’s noisy and a bit over processed in my view. It’s OK on a small phone screen but not on a bigger screen or for a print. But I can live with it until I can get something better because I love the composition.
That is the sort of compromise you will make if you want to stick with your phone. I said at the start that gear doesn’t matter until it does – and these photos prove it.
The technical capabilities of your camera gear do influence the image you create but that won’t hold you back as long as you understand why and how. And, usually, that influence is in what you can get in the picture (focal length/field of view of the lens/focusing), how it renders that picture (sharpness, saturation and tone of colours etc) and what you can do with the picture after taking it (post processing and editing).
Apply Some Lateral Thinking for Inspiration!
Those same limitations can also be a great spur to your creativity as you find ways to work with and around them. It was my use of a phone camera that partly inspired the look of my “Industrial Entertainment” photo project and book:

When I started the project I just wasn’t getting the consistent quality of colour images I wanted. The good old British weather on the days I could get to the park often gave me inconsistent, crappy light. I ended up with a different look and feel to images taken at different times, lots of contrasty, hard shadows, overcast or over-bright detail-less skies and washed out colours. I couldn’t do much with the phone itself because the conditions were outside it’s technical abilities and I couldn’t do much about the weather or the light either – because I can’t just drop everything and drive two hours when the light is right.
So I looked at what I had to work with and realised the phone camera and the conditions were ideal for black and white photos. Black and white is great for showing line, form, contrast and shape – which is exactly what the lens on a phone is good for. I didn’t have to be too picky about the weather and the light (but more on that in another blog) and I could give all my photos a consistent look to tell the story I wanted to tell for my “industrial Entertainment” project.
Here’s an example. This is the original “out of the phone” image, shot on “auto”, that eventually went on the front cover of my book…

It is taken from the queueline of the coaster as part of a burst of images shot as the ride train entered the break run. I wanted to catch the train on the track with the red light and riders waving. The flying hair is a bit of a bonus!
The composition has potential (I will explain why in a later instalment – stay tuned) and the sky has some nice colour, but the sunny and bright mid-day light has caused the camera to under-expose the coaster so it’s too dark and lacking detail. There is a hard shadow across the themed ride control booth and the fixed lens (no zoom!) has captured the ugly distracting wooden fence at the bottom of the frame. Overall this is a photo that is a bit….meh. And definitely not one I would normally show anyone.
I tried adjusting the shadows and the exposure in Snapseed and Lightroom but that just made the coaster look pale and pixelated. A bit like the Rita shot in the slideshow above. It was just not good enough for what I wanted.
But I didn’t want to abandon this shot as I thought it had great dynamic lines and the raised arm and flying hair made nice points of interest so….. I decided to try black and white; this has always been a format more forgiving of crappy light although you still need a good composition.
After some editing work in Lightroom and Photoshop I had this…

Which I think is a far more compelling image than the original colour photo. I used the contrast and poor light to create drama, balance and a much more dynamic composition that emphasised the coaster and the waving rider.
From that point on I pretty much knew that to work within the limitations of my phone camera and still get useable consistent results, I had to shoot for a black and white end result – even if the original was in colour. But it also emphasised my “industrial entertainment” concept and gave me something different from a lot of other coaster pictures. So a good result in the end, although it does take more editing work. But that’s fine because I enjoy that – you might not.
And I decided that for colour photography and more varied compositions I would need my Fuji as it could cope better with the light conditions and give me more flexibility with my shooting.
Exit to the Right….
A phone camera is great start, is fantastically convenient and easy to use. If you are happy with what it can do it might be all you need. But for more serious coaster photography, with a different look, I think you are going to need either as DSLR or one of the newer mirrorless system cameras, and a couple of lenses.
I will explain why and how to get the best out of that set up in my next post.
In the meantime, drop me a comment or message with any questions and I am happy to help you out with your photos!